

How to Decide Which Repair Method Is Best
The easiest way to choose a repair is to consider four things: the size of the bleach mark, the fabric type, the garment color, and whether the fabric itself has been weakened.
A tiny mark on a solid black cotton shirt is a very different repair project from a large pale splash across a patterned polyester dress.
Before buying dye, markers, patches, or paint, take a few minutes to inspect the garment carefully.
For a Tiny Spot
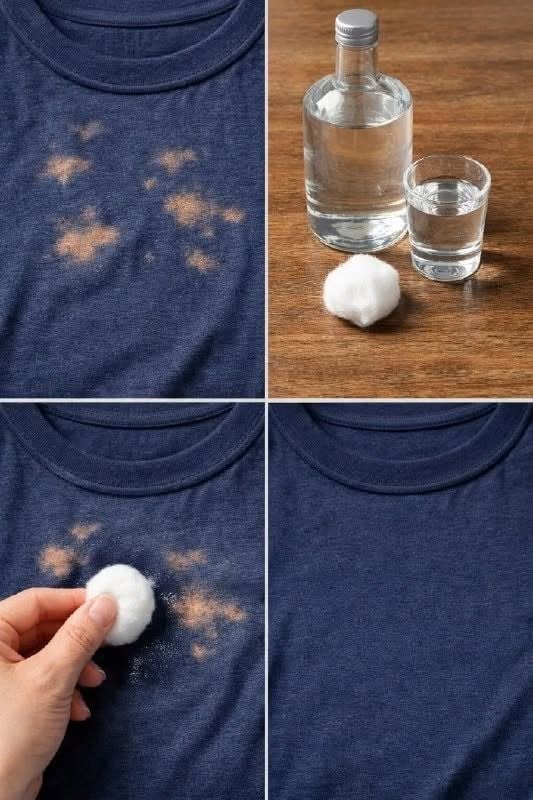
A fabric marker is often the simplest option.
This is especially useful when the garment is a common solid shade and the mark is smaller than a coin.
For Several Small Spots
Several scattered spots may be easier to incorporate into a decorative design than to color individually.
Embroidery, textile paint, small patches, or a deliberate pattern can make the garment look intentional rather than repaired.
For a Large Bleached Area
If a significant section has lost color, full-garment dyeing may be more realistic than trying to recreate the original shade only in one area.
A darker overall color often provides the best chance of reducing the contrast.
For Weakened Fabric
If the bleach damaged the fibers as well as the dye, think about reinforcement.
A sewn patch or appliqué may be more appropriate than simply coloring over the mark.
If the area has become extremely thin or brittle, continued wear may eventually enlarge the damage.
Why Cotton Is Often Easier to Repair
Natural fibers such as cotton are often easier to redye with widely available textile dyes than many synthetic materials.
This does not mean every cotton garment will return to a perfect factory finish, but there are usually more repair options available.
Denim is particularly forgiving because visible repairs, patches, embroidery, and distressed designs can look natural on the fabric.
Why Polyester Can Be More Difficult
Polyester usually requires dyes specifically formulated for synthetic fibers and often needs higher processing temperatures than cotton.
This can make home dyeing more complicated.
Some polyester garments also include special finishes, prints, stretch fibers, or heat-sensitive components.
For a small bleach spot on polyester, decorative covering may therefore be easier than redyeing the entire garment.
Blended Fabrics Can Produce Uneven Results
A cotton-polyester blend contains two different fiber types.
A dye formulated mainly for cotton may color the cotton portion more strongly than the polyester portion.
This can produce a heathered, lighter, or uneven result.
Read the dye instructions carefully and check the garment’s fiber percentages before beginning.
Thread May Not Match After Dyeing
One surprising result of home dyeing is that the main fabric may change color while the stitching remains almost unchanged.
This often happens because garment thread is made from a different fiber than the fabric.
For example, a cotton shirt may be sewn using polyester thread.
If the shirt is dyed, the fabric may become dark while the thread remains noticeably lighter.
Logos and Prints Can React Differently Too
Screen-printed designs, vinyl graphics, embroidered logos, elastic waistbands, zippers, buttons, and labels may not respond to dye in the same way as the surrounding material.
This does not always look bad, but it should be expected before changing the entire garment color.
Can a Tailor or Alterations Professional Help?
Yes.
If the garment is expensive, sentimental, formal, or difficult to replace, a professional tailor may be able to suggest an alteration that looks more polished than a home repair.
Possible solutions can include adding panels, replacing a damaged section, shortening a garment, moving a pocket, adding trim, or creating a decorative detail.
When Professional Dyeing May Be Worth Considering
Some specialty cleaners, costume professionals, textile artists, and garment-dyeing services offer professional recoloring.
This can be worth exploring for high-quality natural-fiber garments, although results still depend on the original dye and bleach damage.
Ask what outcome is realistic before paying for the service.
Repairing a Bleach Spot on Jeans
Jeans are among the easiest garments to creatively repair.
Depending on the location, you can use:
Denim patches
Contrast stitching
Embroidery
Fabric paint
Intentional distressing
Reverse tie-dye
A darker overall dye
Because denim naturally develops color variation with wear, a repair does not always need to be completely invisible.
Repairing a Bleach Spot on a Sweatshirt
Sweatshirts are also good candidates for creative fixes.
A small patch, embroidered symbol, painted design, or larger graphic can cover a damaged area.
If the bleach mark is near the chest, adding a decorative emblem can make the repair look like part of the original design.
Repairing a Bleach Spot on a T-Shirt
For a plain cotton T-shirt, you have many options.
A fabric marker can hide a tiny mark, while textile paint, tie-dye, reverse tie-dye, or full redyeing may work for larger damage.
If the spot is near the lower hem, shortening the shirt can also be an easy solution.
Repairing a Bleach Spot on Towels
Towels are usually less about appearance and more about function.
If the bleach mark affects color only and the fabric remains strong, the towel can usually continue being used.
If bleach has weakened the fibers and the area begins tearing, the towel may be better repurposed into cleaning cloths.
Repairing a Bleach Spot on Bedding
Sheets, pillowcases, and duvet covers can sometimes be redyed if the fiber is compatible.
For small marks on patterned bedding, a perfect color match may be difficult.
If the damage is near an edge, creative sewing or shortening may be possible.
Repairing a Bleach Spot on Work Clothes
For workwear, durability may matter more than an invisible cosmetic repair.
A sturdy sewn patch can cover discoloration and reinforce weakened material at the same time.
This can be particularly practical on work pants, aprons, jackets, or utility clothing.
Can You Use Shoe Polish or Makeup to Cover a Bleach Spot?
Products designed for leather or cosmetics are not ideal for washable fabric.
Shoe polish may transfer, stain other clothing, or react unpredictably during washing.
Makeup can rub off easily and may create an additional oily stain.
Textile-specific products are generally a better option.
Can Acrylic Paint Be Used?
Ordinary acrylic paint may dry stiff and crack on flexible fabric.
Fabric paint is specifically formulated to remain more suitable for textiles.
If acrylic paint is used for a craft project, a textile medium may sometimes be added according to product directions, but dedicated fabric paint is usually simpler.
Why Some DIY Repairs Look Worse After Washing
A repair that looks perfect when freshly applied may change after laundering.
Ink may fade, paint may crack, dye may bleed, or patches may loosen.
This is why following the product’s curing, heat-setting, and washing instructions matters.
Wash Repaired Garments Carefully at First
After a repair, the first wash deserves extra attention.
Depending on the product used, it may be wise to wash the garment separately or with similar dark colors.
Follow the repair-product instructions and the garment care label.
Avoid unnecessarily high heat if it could damage the repair or fabric.
Prevent Future Bleach Accidents
Repairing bleach damage is useful, but preventing the next accident is even better.
Many bleach marks happen not while doing laundry, but while cleaning bathrooms, sinks, floors, toilets, or kitchen surfaces.
Wear Old Clothes During Bleach Cleaning
If you are cleaning with a bleach-containing product, wear clothing you would not be upset to discolor.
Even a small invisible splash can create a mark after a few moments.
Use Protective Gloves and Follow the Product Label
Wear the protective equipment recommended by the bleach manufacturer.
Follow instructions for dilution, ventilation, contact time, rinsing, and storage.
Do not assume that stronger concentration means better cleaning.
Pour Bleach Carefully
A common source of accidental splashes is pouring concentrated bleach directly from a large bottle.
Use care when measuring or transferring it.
Avoid placing clothing, towels, or fabric items near the area where bleach is being handled.
Do Not Set Bleach Bottles on Fabric
A small amount of product around the cap or base of a container can transfer onto clothing, rugs, towels, or upholstered surfaces.
Place the container on a suitable hard surface instead.
Be Careful With Bathroom Towels
Hand towels and bath towels frequently become accidentally bleached because they are left near sinks, toilets, or cleaning supplies.
Remove textiles from the immediate cleaning area before starting.
Do Not Spray Bleach Near Clothing
Fine droplets from spray cleaners can travel farther than expected.
If using a bleach-containing spray, keep clothing, curtains, rugs, and other fabrics out of the spray zone.
Store Bleach Securely
Keep bleach in its original labeled container and store it according to the manufacturer’s instructions.
Do not transfer bleach into drink bottles or unmarked containers.
This reduces the risk of dangerous confusion and accidental exposure.
Never Mix Cleaning Products
This safety rule is worth repeating.
Bleach should never be casually mixed with vinegar, ammonia, toilet cleaners, acidic products, or other household chemicals.
More products do not mean more cleaning power.
Unsafe chemical combinations can create dangerous fumes.
What If Bleach Gets on Your Skin?
If household bleach contacts the skin, follow the product label and rinse the affected area thoroughly with water.
Remove contaminated clothing if necessary.
Seek appropriate medical advice if significant irritation, burning, blistering, or other concerning symptoms develop.
What If Bleach Gets in the Eyes?
Eye exposure requires immediate rinsing with plenty of clean water according to appropriate first-aid guidance and the product label.
Seek urgent professional advice because eye exposure can cause significant irritation or injury.
What If Bleach Fumes Cause Breathing Problems?
Move to fresh air and seek urgent medical advice if coughing, chest tightness, difficulty breathing, dizziness, or significant irritation develops.
Severe breathing difficulty requires emergency attention.
When the Garment Is Not Worth Repairing
Sometimes the bleach damage is simply too extensive.
If the fabric has become thin, brittle, badly torn, or weakened over a large area, continuing to repair it may not be practical.
In that case, repurposing the usable fabric can still keep the garment from going immediately into the trash.
Turn the Accident Into a Design Choice
One of the easiest ways to stop being frustrated by a bleach mark is to stop treating the repair as something that must be invisible.
Embroidery, patches, fabric paint, contrasting panels, reverse tie-dye, and decorative stitching can turn accidental damage into something completely intentional.
Visible mending has become a creative style in its own right, and many repaired garments end up looking more distinctive than they did before the accident.
The Bottom Line
A bleach mark is usually permanent dye damage rather than an ordinary stain, so repeated washing will not restore the missing color.
But permanent discoloration does not automatically mean the garment is ruined.
Small spots can often be disguised with a fabric marker. Larger areas may be handled with textile dye, fabric paint, patches, embroidery, appliqué, alterations, or a deliberate new pattern.
The most important step after a fresh spill is to rinse the fabric thoroughly with water and avoid mixing bleach with other household chemicals.
Once the garment has been washed and dried, inspect both the color and the strength of the material before choosing a repair.
If the fibers remain sound, there is often a practical or creative way to keep using the garment.
And sometimes the best repair is not restoring the clothing to exactly how it looked before. It is turning an unwanted pale mark into a design that looks like it was meant to be there all along.