

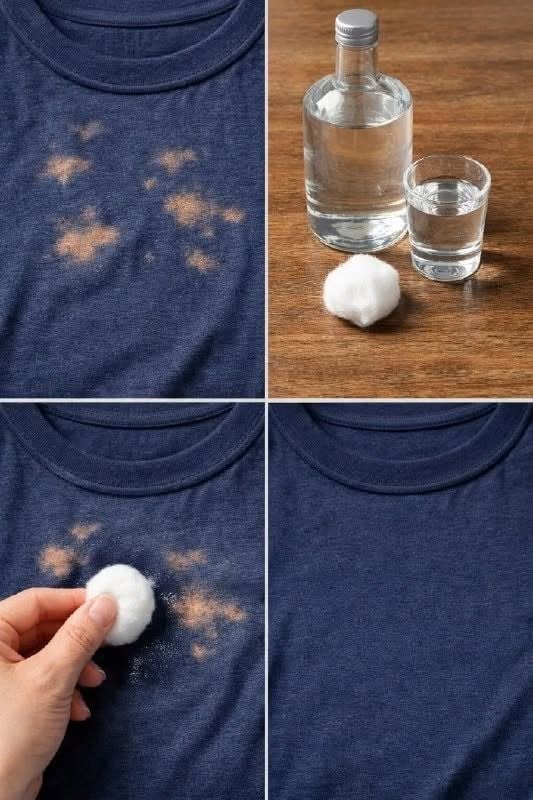
A few drops of bleach can ruin the appearance of a favorite shirt, pair of pants, towel, or sweatshirt in seconds. One moment the fabric looks perfectly normal, and the next there is a pale orange, yellow, pink, or nearly white mark that refuses to disappear no matter how many times the garment is washed.
The frustrating truth is that a bleach mark is usually not a conventional stain. Chlorine bleach can chemically alter or remove the dye that gives fabric its color. Once that pigment has been damaged, ordinary stain removers and repeated washing generally cannot bring the original shade back.
That does not necessarily mean the garment belongs in the trash.
Depending on the fabric, the size of the mark, and where the discoloration appears, you may be able to disguise the area with a fabric marker, recolor the entire garment with textile dye, cover the mark with embroidery or a patch, or deliberately transform the piece into a new design.
The first priority, however, is safety. If bleach is still present on the fabric, rinse it thoroughly with plenty of water and do not start experimenting with vinegar, ammonia, alcohol, acids, or other household chemicals. Bleach can react dangerously with certain substances.
Why Bleach Marks Are Different From Ordinary Stains
When tomato sauce, coffee, mud, or grease lands on clothing, the unwanted substance usually sits on or becomes trapped within the fibers. Cleaning works by loosening, dissolving, or lifting that material out.
Bleach damage is different.
Chlorine bleach is an oxidizing chemical. On colored fabrics, it can alter the molecules responsible for the garment’s color.
That means the visible pale area may represent missing or chemically changed dye rather than something sitting on top of the fabric.
This is why washing the garment again and again usually does not solve the problem.
Why a Bleach Mark Can Turn Orange or Pink Instead of White
Not every bleach splash becomes completely white.
Many fabric colors are created by combining several dyes. Bleach may affect some of those pigments more quickly than others.
For example, a black garment may develop orange, reddish, tan, or yellow patches rather than immediately turning white.
A navy garment may fade toward pink, purple, gray, or pale blue.
The exact result depends on the original dye, fabric type, bleach concentration, exposure time, and garment manufacturing process.
What to Do Immediately After Bleach Gets on Clothing
If the spill has just happened, acting promptly may help limit additional damage.
Step 1: Move Away From the Bleach Source
Stop whatever caused the exposure and move the garment away from the bleach container or cleaning area.
Be careful not to spread concentrated bleach onto other parts of the clothing.
Step 2: Rinse With Plenty of Water
Rinse the affected fabric thoroughly under cool or lukewarm running water.
Allow water to pass through the fibers for several minutes so residual bleach is diluted and carried away.
Gently move the fabric with your fingers while rinsing.
Avoid aggressively rubbing the damaged area because bleach can weaken certain fibers.
Step 3: Follow the Garment Care Label
Once the bleach has been thoroughly rinsed away, wash the garment according to its care label if appropriate.
Different fibers tolerate different temperatures, detergents, and drying methods.
Step 4: Let the Garment Dry Before Judging the Color
Wet fabric often looks darker than dry fabric.
Allow the garment to dry so you can accurately see how much discoloration remains.
At this stage, you can decide whether the damage is small enough to disguise or large enough to justify redyeing or redesigning the garment.
Most Important Safety Rule: Do Not Mix Bleach With Other Household Chemicals
One of the most dangerous mistakes is trying to “neutralize” bleach by immediately pouring another cleaner onto it.
Do not mix bleach with:
Ammonia
Vinegar
Acidic cleaners
Toilet bowl cleaners
Alcohol-based cleaners
Other household cleaning products unless the label specifically says they are compatible
Certain combinations involving bleach can release dangerous gases or create other hazardous reactions.
The safest immediate response to bleach on fabric is thorough dilution and rinsing with water, not experimenting with additional chemicals.
Do Not Trust Viral “Bleach Neutralizing” Hacks Automatically
Online laundry tips sometimes recommend applying vinegar, rubbing alcohol, hydrogen peroxide, baking soda, or various mixtures directly to fresh bleach stains.
That can be risky or simply ineffective.
If bleach may still be present, the priority is rinsing it away thoroughly.
Once the garment has been washed, dried, and is free of residual bleach, any repair method should focus on restoring appearance rather than trying to chemically reverse dye destruction.
Can the Original Color Be Restored?
Sometimes a close visual match is possible, but the original dye generally cannot simply be “washed back in.”
Once bleach has removed or altered the pigment, the practical options are usually:
Coloring the damaged spot
Redyeing the whole garment
Adding a decorative patch
Adding embroidery
Creating a deliberate pattern
Covering the area with fabric paint
Repurposing the garment
Option 1: Use a Fabric Marker for Tiny Bleach Spots
For very small marks, a fabric marker can be one of the easiest solutions.
This works best when:
The garment is a solid color
The bleach spot is small
The fabric is relatively smooth
You can find a marker close to the original shade
Black, dark blue, brown, and other common colors are often easier to approximate than unusual shades.
How to Use a Fabric Marker
First, make sure the garment has been thoroughly rinsed, washed, and dried.
Test the marker somewhere hidden, such as an inside seam or hem.
If the color looks suitable, gently apply a small amount to the bleached area.
Build the color gradually rather than saturating the spot immediately.
Follow the marker manufacturer’s instructions regarding drying, heat setting, and washing.
Why You Should Test the Marker First
The marker cap or package may look like an exact color match, but the ink can appear very different once it touches fabric.
The original garment dye also affects how the repaired area looks.
A test prevents turning one small pale mark into a larger dark patch.
Permanent Marker Is Not the Same as Fabric Marker
Ordinary permanent markers may appear to work temporarily, especially on black clothing, but they are not specifically designed for fabric.
They may fade, bleed, transfer, or develop a different tone after washing.
A textile marker designed for washable fabric is usually a better choice.
Option 2: Redye the Entire Garment
If the bleach damage covers a large area or appears in several places, redyeing the entire garment may create a more consistent result than trying to recolor each spot individually.
Textile dyes are available for different fiber types.
Always choose a dye that is compatible with the garment’s fabric composition.
Check the Fiber Label Before Dyeing
A cotton shirt may accept dye very differently from polyester, acrylic, nylon, wool, silk, or a blended fabric.
The care label usually lists percentages such as:
100% cotton
Cotton/polyester blend
100% polyester
Viscose
Rayon
Nylon
Wool
Silk
Elastane blends
Use a dye intended for that material and follow the dye manufacturer’s instructions carefully.
Why Bleached Areas May Still Look Different After Dyeing
Even after redyeing, the damaged area may not absorb color exactly like the surrounding fabric.
Bleach can alter both dyes and fibers.
As a result, the repaired area might remain slightly lighter or darker.
Choosing a darker final color can sometimes make differences less noticeable.
Before giving up on a bleached garment, look closely at the size and location of the damage—the smallest marks often need only a tiny cosmetic repair, while larger ones can become the starting point for a completely new design.