Step 5: Churn
Churn in an ice cream maker until soft-serve texture, then freeze until firm.
👉 This method gives you the richest, most velvety ice cream possible.
⚡ No-Churn Method (Quick & Easy)
Step 1: Whip Cream
Beat cold cream until stiff peaks form.
Step 2: Combine
Mix condensed milk, vanilla, and salt. Gently fold in whipped cream.
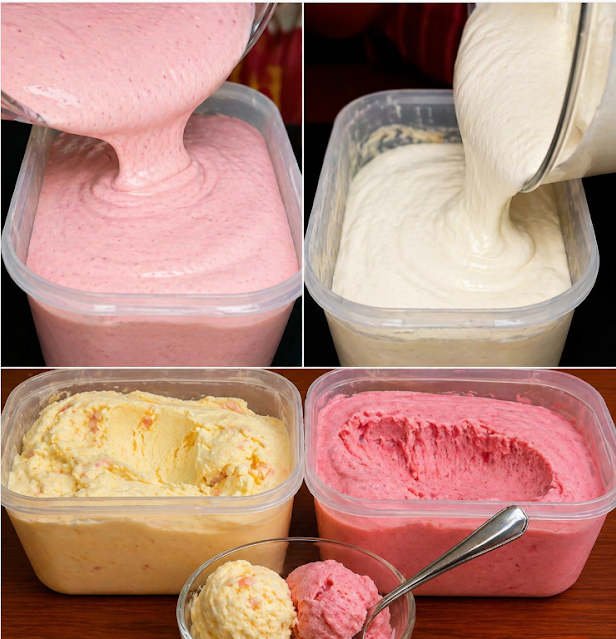
Step 3: Freeze
Add mix-ins, pour into a container, cover, and freeze for at least 6 hours.
👉 No machine needed—and still incredibly creamy!
🧠 Tips for the Perfect Texture
- 🥛 Use full-fat dairy (low-fat = icy texture)
- ❄️ Chill everything before freezing
- ⏱️ Don’t over-churn
- 📦 Store in airtight containers
- 🧻 Press parchment paper on top to prevent ice crystals
🍓 Popular Flavor Variations
- 🍫 Chocolate: Add cocoa powder or melted chocolate
- 🍓 Strawberry: Swirl in sweetened puree
- ☕ Coffee: Infuse cream with coffee beans
- 🌿 Mint Chocolate Chip: Add mint extract + chocolate chips
👉 Once you master the base, the possibilities are endless.
⚠️ Common Mistakes to Avoid
- Skipping the chilling step
- Using low-fat ingredients
- Adding raw fruit (adds water → ice crystals)
- Freezing in deep containers (slower freezing = worse texture)
🍽️ Serving & Storage
- Let ice cream sit 5–10 minutes before scooping
- Use a warm scoop for smooth servings
- Store up to 2 weeks for best flavor and texture
🧾 Final Thoughts
Homemade ice cream isn’t just a recipe—it’s an experience. With the right technique, you can create something richer, fresher, and more satisfying than anything store-bought.
Whether you choose the classic custard method or the easy no-churn version, one thing is guaranteed:
👉 Creamy, delicious ice cream—made exactly how you love it.
