🍰 Steamed Ube Yema Cake (Soft, Fluffy & Irresistibly Creamy)


💜 Why You’ll Love This Cake
This isn’t your typical cake. It’s:
- Super soft and airy (thanks to the meringue)
- Naturally vibrant purple from ube
- Topped with a rich, creamy yema frosting
- Perfect even without an oven
If you love Filipino desserts, this one is a must-try.
🧾 Ingredients
🥣 Cake Batter
- ¾ cup evaporated milk (187 ml)
- ⅓ cup cooking oil (93 ml)
- 4 egg yolks
- ¾ tbsp baking powder (7 g)
- ½ tsp salt (2 g)
- 3 tbsp ube powder (24 g)
- 1½ cups all-purpose flour (180 g)
- ½ cup sugar (100 g)
- 1 tbsp ube flavor & color
☁️ Meringue
- 4 egg whites
- ¾ tsp vinegar
- ⅔ cup sugar (125 g)
🍮 Yema Frosting
- 5 egg yolks
- 1 cup condensed milk (250 ml)
- 1 can evaporated milk (370 ml)
- 2½ tbsp cornstarch (20 g)
- ¼ tsp salt (1 g)
- 3 tbsp butter or margarine (30 g)
👩🍳 Step-by-Step Instructions
1️⃣ Prepare the Batter
In a bowl:
- Mix evaporated milk, oil, and egg yolks
- Add sugar and mix well
- Sift in flour, baking powder, salt, and ube powder
- Add ube flavor & color
- Mix until smooth and lump-free
2️⃣ Make the Meringue
- Beat egg whites until foamy
- Add vinegar
- Gradually add sugar while beating
- Whip until stiff peaks form
👉 This is the secret to a fluffy cake!
3️⃣ Combine Mixtures
- Gently fold the meringue into the batter
- Do NOT overmix—keep it light and airy
4️⃣ Prepare for Steaming
- Pour batter into molds (6x4x1½ size)
- Fill about ¾ full
👉 Makes 4 pans
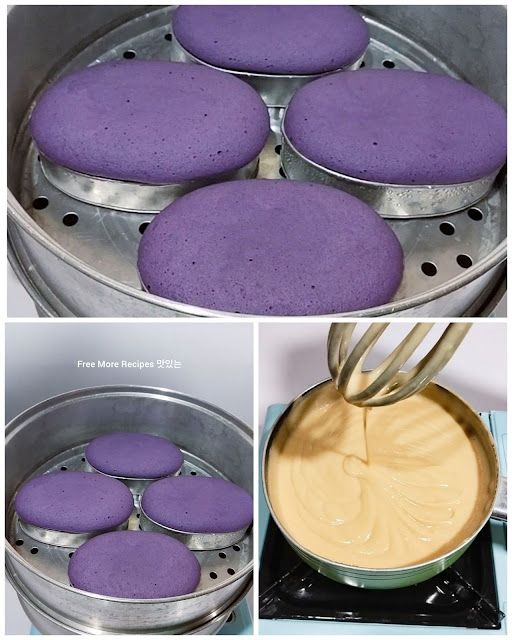
5️⃣ Steam the Cake
- Boil water first before placing cakes
- Steam on medium-low heat
- Cook for 25 minutes
💡 Tip: Cover lid with cloth to prevent water droplets from dripping on cake.
🍮 Make the Yema Frosting
- In a pan, combine:
- Egg yolks
- Condensed milk
- Evaporated milk
- Cornstarch
- Salt
- Cook over low heat:
- Stir constantly until thick
- Add butter:
- Mix until smooth and glossy
- Let it cool slightly before spreading
🎂 Final Assembly
se you next post
